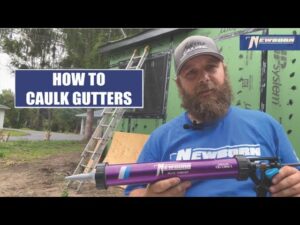
Hi, I’m Brian Glass, an engineer here at Newborn, and I’m excited to walk you through how to use the Model U-Lite caulk gun. The U-Lite isn’t just another caulking tool—it’s a drip-free model designed to provide you with cleaner, more controlled applications of sealants and adhesives. Whether you’re a seasoned professional or a DIY enthusiast tackling your first home improvement project, understanding how the U-Lite works will make all the difference in your results.
In this guide, I’ll explain the unique features of the U-Lite, demonstrate proper loading and unloading techniques, walk you through cutting the nozzle at just the right angle, and show you how to achieve an even, consistent bead without messy drips. We’ll also cover how to make use of half cartridges for those tight, awkward spaces. By the end of this post, you’ll be equipped with the knowledge and confidence to use your U-Lite like a pro.
What Makes the U-Lite Drip-Free?
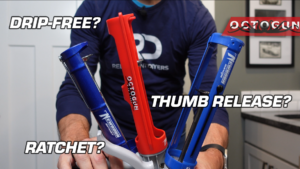
One of the standout features of the U-Lite is its drip-free design. Traditional caulk guns rely on constant pressure to dispense material, which often leads to excess sealant oozing out even after you’ve released the trigger. This not only wastes material but can also create extra cleanup work and leave you with less-than-perfect lines.
The U-Lite’s internal mechanics solve this problem. When you let go of the trigger, the tension on the rod is released, stopping the flow of material immediately. This “drip-free” functionality means you get more control over the placement and amount of sealant. It’s a simple but game-changing innovation that ensures your work area stays cleaner and your finished lines look neater.
Understanding the Rod Mechanism
To fully appreciate the U-Lite, it’s crucial to understand how its rod mechanism works. Unlike standard caulk guns, the U-Lite requires a specific approach to retracting the rod when you want to load or remove a cartridge.
Key Tip: When pulling the rod back, hold only the back portion of the handle. Avoid squeezing the trigger and back handle at the same time. If you do both, you’ll lock the rod, making it difficult or impossible to retract it. By holding just the back of the handle, the rod will slide back smoothly, allowing you to load or unload the cartridge with ease.
Loading the Cartridge Step-by-Step
- Pull the Rod Back: First, hold the back handle only and pull the rod straight back until you have enough space to insert the cartridge.
- Insert the Cartridge: Slide the sealant cartridge into the U-Lite’s housing. Listen for a distinctive “click” that tells you the cartridge is properly seated. The U-Lite is designed so you don’t have to struggle or guess—this click gives you the confirmation you need.
- Rotate as Needed: Here’s a feature you’ll love: even with the cartridge fully inserted, you can still rotate it. This rotation lets you keep the nozzle at the exact angle you need, especially when working around corners or odd angles. No more contorting your wrist or dealing with awkward positions—just rotate the cartridge inside the gun for perfect bead orientation.
Unloading the Cartridge
At some point, you’ll need to remove a cartridge—maybe it’s empty, or maybe you need to switch to a different sealant. Removing it is as straightforward as loading it:
- Hold the Cartridge: Stabilize the cartridge with one hand.
- Pull the Rod Back: Using your other hand, grasp only the back handle and pull the rod back. The teeth inside will release their hold on the cartridge’s plunger.
- Lift the Cartridge Out: Once the rod is disengaged, slide the cartridge out of the housing. It’s that simple.
This easy removal process means switching cartridges or storing partial tubes for later use is a breeze.
The Built-In Spout Cutter and Seal Puncture Tool
No more searching your toolbox for a knife or a separate puncture tool. The U-Lite comes equipped with both a spout cutter and a seal puncture tool, conveniently integrated right into the handle.
Spout Cutter Usage:
- Cut at a 45° Angle: Insert the tip of the cartridge’s nozzle into the spout cutter and slice it off at about a 45° angle. Starting with a smaller opening gives you greater control over the flow of material. If you need more, you can always cut it wider.
- Why 45°? A 45° angle ensures a better bead. You’ll find that sealant flows more evenly and it’s easier to direct into corners and edges.
Seal Puncture Tool Usage:
- Accessing the Tool: The seal puncture tool is tucked away in the back handle. Simply slide it out when you need it.
- Breaking the Inner Seal: Most cartridges have an inner foil seal to keep the material fresh. Insert the puncture tool into the nozzle and gently break the seal.
- Keep It Clean: After breaking the seal, it’s a good idea to set the puncture tool aside and clean it before storing it back in the handle. This prevents dried sealant from building up inside your gun.
Achieving a Consistent, Drip-Free Bead
Now that you know how to load and prepare your cartridge, let’s talk about applying the sealant.
- Position the Nozzle: Place the nozzle tip where you want to start your bead.
- Steady Pressure on the Trigger: Squeeze the trigger gently and apply steady, even pressure. You’ll see the sealant flow out. With the U-Lite’s drip-free feature, as soon as you release the trigger, the flow will stop.
- Maintaining the Bead Consistency: If you want a perfectly uniform line, release the trigger but keep the nozzle in place for a moment. This allows the material to settle and ensures a clean break in the bead without creating a gap or leaving a blob of extra material.
Practice Makes Perfect: Don’t be afraid to practice on a scrap piece of wood or cardboard before tackling your actual project. With a bit of experience, you’ll quickly learn how much pressure to apply and how fast to move for a flawless, professional-looking bead.
Using Half Cartridges for Tight Spaces
One of the unique and convenient features of the U-Lite is the ability to use half cartridges. Imagine you’ve used half of a cartridge and need to get into a cramped area where a full-length cartridge just won’t fit. Instead of struggling, you can modify your cartridge to better suit the environment.
- Cutting the Cartridge: Once you’ve used half (or more) of the sealant, remove the cartridge from the gun. Using a hacksaw or similar tool, cut the cartridge behind the internal plunger. Make sure the edge is straight and free of burrs.
- Reload the Half Cartridge: Insert this shortened cartridge into the U-Lite’s housing. The plunger inside will still engage with the shortened cartridge, allowing you to dispense the remaining sealant in a tighter space.
- Benefits of Half Cartridges: This trick is perfect for reaching corners behind fixtures, inside cabinets, or anywhere a full-size cartridge would be unwieldy.
Choosing the Right Sealant
The U-Lite is designed to work with a variety of sealants and adhesives. However, selecting the right material for your project is just as important as choosing the right tool. Common types include:
- Silicone Caulk: Ideal for bathrooms and kitchens, silicone creates a waterproof seal around tubs, sinks, and showers.
- Acrylic Latex Caulk: Great for general interior applications, it can be painted over to match walls and trim.
- Polyurethane Sealants: Excellent for exterior applications where weather resistance and durability are paramount.
No matter which type you choose, always read the manufacturer’s instructions and ensure it’s compatible with the surfaces you’ll be sealing.
Tips for Perfect Results
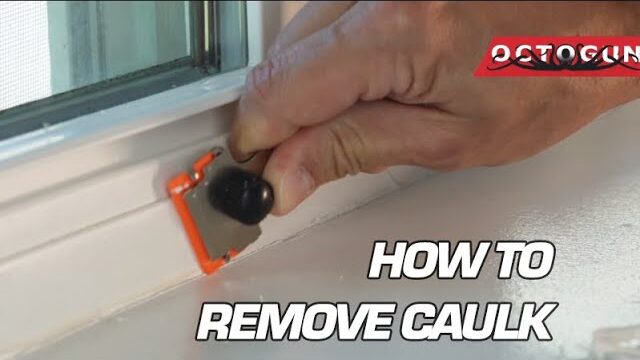
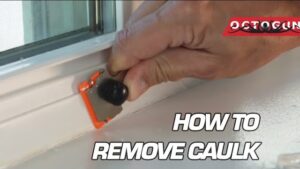
- Prep Your Surface: Clean and dry the area you’ll be sealing. Remove old caulk or sealant, and ensure there’s no dust, dirt, or debris that could prevent a good bond.
- Use Painter’s Tape: For extra precision, use painter’s tape along both sides of the joint or seam you’re sealing. After you’ve laid down the bead, smooth it out and then carefully remove the tape for a crisp, clean edge.
- Steady Your Hand: If you’re new to caulking, use your free hand to support the gun or rest your elbow against a stable surface to keep your hand steady.
- Work at a Comfortable Pace: Don’t rush. Moving too quickly can create uneven lines, while moving too slowly can deposit more material than necessary. With a little patience and practice, you’ll find the right speed.
Cleaning Up After the Job
When you’ve finished applying the sealant, you might have some excess material or residue on your U-Lite, tools, or work surface. Here’s how to clean up:
- Wipe Down the Gun: Use a damp cloth or paper towel to remove any sealant from the U-Lite’s exterior. Keeping it clean ensures smooth operation next time.
- Clean the Spout Cutter and Puncture Tool: If there’s sealant stuck to these tools, wipe them off before the material cures. It’s much easier to clean them right away than after the sealant hardens.
- Dispose of Leftover Material Properly: If you have a partially used cartridge, seal the nozzle with a cap or plastic wrap. Store it upright in a cool, dry place. Check the manufacturer’s guidelines for storage life.
Maximizing the U-Lite’s Lifespan
With proper care, your U-Lite can last a very long time. Here are a few maintenance tips:
- Avoid Forcing the Rod: If you feel resistance when retracting or advancing the rod, double-check your technique. Remember, don’t squeeze the trigger and the back handle at the same time when pulling the rod back.
- Lubricate Occasionally: A small amount of light lubricant on the rod can keep it moving smoothly. Wipe away any excess so it doesn’t contaminate your sealant.
- Inspect for Wear: Over time, the internal components may show signs of wear. If you notice anything out of the ordinary, contact our customer service department. We’ll be happy to guide you through any necessary steps.
Safety Considerations
While the U-Lite makes dispensing sealant easier, always remember these safety tips:
- Use Gloves and Eye Protection: Some sealants can be irritating to the skin and eyes. Wear gloves and safety glasses to stay protected.
- Work in a Well-Ventilated Area: If you’re using a sealant with strong fumes, open windows or use fans to ensure proper ventilation.
- Follow Manufacturer’s Instructions: Always read the sealant’s label for any additional safety guidelines or precautions.
Troubleshooting Common Issues
Even with a user-friendly tool like the U-Lite, you may encounter a few hiccups:
- If the Rod Won’t Retract: Make sure you’re not squeezing the trigger when pulling it back. Only hold the back handle.
- If Material Continues to Drip After Releasing the Trigger: The U-Lite is drip-free, so excess drip might be caused by residual pressure. Try holding the nozzle in place for a moment after releasing the trigger, then lift it away. If dripping persists, check for a damaged cartridge or clogged nozzle.
- If the Bead Is Uneven: Practice your trigger pressure and movement speed. Adjusting the nozzle angle or using a smaller nozzle opening can help.
Professional Applications
While the U-Lite is perfect for DIY projects around the home, it’s also an excellent choice for professionals:
- Contractors and Handymen: Save time on jobs with less cleanup and more precise bead lines.
- Window and Door Installers: Get clean, watertight seals around frames without messy drips.
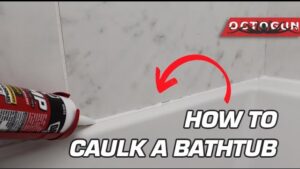
- Bathroom and Kitchen Remodelers: Apply silicone for sinks, tubs, and showers neatly and efficiently.
The U-Lite’s ease of use and flexibility make it a valuable addition to any toolkit, whether you’re a weekend warrior or a seasoned contractor.
Environmental Considerations
Minimizing waste is important in any project. With the U-Lite’s drip-free operation, you’ll use only what you need and waste less sealant. That’s good for your wallet and the environment.
- Use Eco-Friendly Sealants: Consider water-based or low-VOC sealants for interior projects, reducing harmful fumes and making your workspace healthier.
- Store Leftovers Correctly: Properly storing partially used cartridges ensures less product goes to waste.
Expanding Your Skills
Now that you know how to use the U-Lite, consider practicing advanced techniques:
- Tooling the Bead: After laying down the bead, you might want to “tool” it—essentially smoothing it with a specialized tool or even a gloved finger. This ensures a perfect finish and helps the sealant fully adhere to both surfaces.
- Layering Materials: Some projects may require multiple layers of sealant. The U-Lite makes it easy to control each layer’s thickness, helping you achieve a more durable and professional result.
- Combining with Backer Rods: For larger gaps, insert a backer rod before applying sealant. This reduces the amount of sealant needed and helps maintain the correct depth, ensuring better performance over time.
Frequently Asked Questions (FAQ)
Q: Can I use the U-Lite with any cartridge brand?
A: Yes, as long as the cartridge is a standard size. The U-Lite is designed to work with a wide range of sealant brands and types.
Q: How do I know if I’ve cut the nozzle too large?
A: If the sealant is flowing too fast or you’re getting more material than needed, the hole might be too big. Start small and enlarge only if necessary.
Q: Is the U-Lite suitable for thicker adhesives?
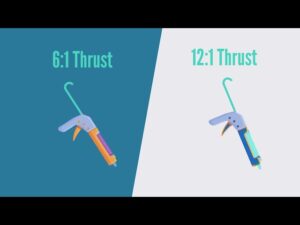
A: The U-Lite handles most standard sealants and adhesives. For extremely high-viscosity materials, check the manufacturer’s instructions or consider a gun with a higher thrust ratio.
When to Replace Your U-Lite
With proper care, the U-Lite should last for many projects. However, consider replacing it if:
- The Rod Sticks or Slips Consistently: Minor lubrication might help, but if the problem persists, it could be time for a new model.
- Visible Damage: Cracks in the housing, bent rods, or worn teeth can affect performance.
- Changed Project Needs: If you begin working on projects that require a different thrust ratio or special features, upgrading might be beneficial.
Contacting Customer Service
If you still have questions or run into an issue that this guide hasn’t covered, don’t hesitate to reach out. Our customer service team is here to help you:
- Phone or Email: Find contact details on our website.
- Online Resources: Check out how-to videos, FAQs, and troubleshooting guides online.
- Personalized Support: If you have a unique problem, we’re happy to provide tailored recommendations to get you back on track.
Conclusion
The U-Lite drip-free caulk gun is designed to make your life easier, whether you’re sealing a window frame, waterproofing your bathroom, or working on a commercial construction site. Its drip-free feature, integrated tools, cartridge rotation capability, and flexibility with half cartridges all contribute to a smoother, more controlled application process.
As you become familiar with the U-Lite, you’ll find yourself saving time, reducing waste, and achieving cleaner, more professional results. It’s not just about having the right tool—it’s about knowing how to use it effectively. With the insights and tips provided in this comprehensive guide, you’re well on your way to mastering the U-Lite and making every caulking job a success.
Thanks for tuning in, and remember, if you need any further information or assistance, we’re just a call or click away. Have a great day and happy sealing!
