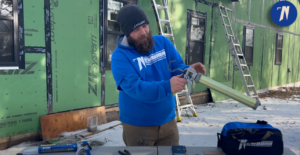
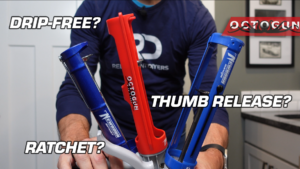
Hi, I’m Brian Glass, an engineer here at Newborn, and today I’m excited to walk you through the details of using a drip-free “C” gun with three of our most popular models. Whether you’re a seasoned professional or a first-time DIYer, understanding how these tools operate will help you achieve smooth, even beads of sealant without the frustrating mess of drips and excess material.
The three models we’ll be focusing on are the:
- 112D: A hex rod, parallel frame model that comes equipped with a spout cutter, seal puncture tool, and our patented “buddy” finishing tool.
- 102D: A hex rod, cradle-frame model, also outfitted with a spout cutter, seal puncture tool, and the same versatile finishing tool.
- 189D: A super ratchet-rod, cradle-frame model that includes a spout cutter and seal puncture tool.
As we go through each model, you’ll learn tips and techniques for everything from loading the cartridge to laying down a professional-quality bead. By the time you’ve finished reading, you’ll have a solid understanding of how to get the most out of your drip-free caulk gun—ensuring cleaner joints, less wasted material, and a more pleasant application experience.
Understanding Drip-Free Technology
Before we get into the specifics of each model, let’s talk about what makes a caulk gun “drip-free.” You’ve probably used a standard caulk gun at some point and noticed that when you release the trigger, material continues to ooze out. This can be wasteful and messy. Drip-free guns are designed to relieve pressure on the cartridge the moment you let go of the trigger, preventing unwanted flow. The internal mechanism pulls back slightly on the rod, releasing tension and stopping the flow of sealant. This means no wasted product, fewer cleanup issues, and a neater, more controlled bead.
In practical terms, a drip-free gun allows you to start and stop your bead precisely. If you’re caulking around a window frame or along a shower enclosure, you can easily create clean lines without having to wipe away excess material. This technology saves time, reduces frustration, and ensures you’ll have a more professional finish—no matter your level of experience.
Key Features of the Three Models
1. The 112D Hex Rod Parallel Frame
The 112D model is a hex rod, parallel-frame drip-free gun. Its parallel frame design provides a sturdy, comfortable grip and a solid feel in your hand. The hex rod ensures a smooth advancement of the cartridge, and the drip-free mechanism helps prevent over-dispensing.
Built-in Tools:
- Spout Cutter: A built-in blade lets you cut the cartridge nozzle at a precise angle.
- Seal Puncture Tool: A fold-out metal rod makes it easy to puncture the inner foil seal of the cartridge.
- Buddy Finishing Tool: This patented finishing tool helps you achieve perfectly tooled joints and professional-looking beads.
2. The 102D Hex Rod Cradle Frame
The 102D model is similar in functionality to the 112D but features a cradle frame. The cradle design provides stable support for the cartridge, making it especially handy if you’re new to caulking or working on unsteady surfaces.
Built-in Tools:
- Spout Cutter
- Seal Puncture Tool
- Buddy Finishing Tool
The hex rod and drip-free action are the same quality as the 112D, so you can expect smooth operation and easy control.
3. The 189D Super Ratchet Rod Cradle
The 189D differs in that it uses a super ratchet rod rather than a hex rod. This means the mechanism advances differently, offering a unique “click” feel with each trigger pull. It’s also drip-free and comes with:
Built-in Tools:
- Spout Cutter
- Seal Puncture Tool
While it doesn’t come standard with the buddy finishing tool, you can still purchase one separately. The 189D excels at handling tougher materials and gives you that classic ratchet feel, while still boasting drip-free convenience.
How to Hold and Operate the Rod
A key detail with drip-free guns is understanding how to pull back the rod correctly. If you’ve ever struggled with retracting the rod, it might be due to how you’re gripping the tool.
Pulling Back the Rod on the 112D and 102D
For both the 112D and 102D (which share a similar hex rod mechanism), the proper technique is simple:
- Hold Only the Back Handle: When you want to pull the rod back, do not squeeze the trigger. Just hold the rear part of the handle and pull the rod straight out.
- Avoid the Front Trigger While Retracting: The front trigger is what engages the drive mechanism. If you squeeze it while trying to pull the rod back, you’re effectively locking it in place. By only holding the back handle, you keep the rod free.
By using this approach, you’ll find that the rod slides back effortlessly, allowing you to load or remove the cartridge with ease.
Adjusting the Rod on the 189D
The 189D super ratchet rod model requires a slightly different approach:
- Orientation of the Teeth: To retract the rod, make sure the teeth on the rod are facing upward. If they face downward, you won’t be able to pull it back.
- Turning the Rod to Engage Forward Movement: Once you’ve pulled it back to load your cartridge, you’ll need to rotate the rod so that the teeth face downward to advance the rod forward when squeezing the trigger.
Getting used to this feature might take a moment, but once you have the hang of it, you’ll appreciate the precise control it offers.
Step-by-Step Guide: Laying Down a Bead
Now that you understand the basics of each model, let’s go through the process of laying down a bead. We’ll focus on the 112D, but the same principles apply to the 102D and 189D (with minor adjustments for rod operation).
1. Prepare the Cartridge
Remove the Buddy Finishing Tool (112D and 102D): Many users store the buddy finishing tool on the gun itself. Take a moment to remove it and set it aside.
Pull the Rod Back: Grip the back handle only and draw the rod fully back. This creates space for the cartridge.
Insert the Cartridge: Place the cartridge into the frame with the nozzle end pointing forward. For the 112D, the parallel frame holds it snugly; for the 102D and 189D, the cradle frame makes it easy to position.
2. Cut the Nozzle
Use the Spout Cutter: Position the tip of the cartridge’s nozzle into the spout cutter at about a 45° angle. Gently squeeze the trigger to cut.
Start Small: Begin with a small hole. You can always widen it if you need more material flow. A smaller opening gives you more control and prevents over-dispensing.
3. Puncture the Inner Seal
Many cartridges have an inner foil seal.
Use the Seal Puncture Tool: Swing out the puncture rod and insert it into the nozzle to break the seal. Make sure you’ve fully pierced it so the material can flow freely.
4. Advance the Rod
For the 112D and 102D: Simply squeeze the trigger gently until the rod comes into contact with the cartridge’s plunger.
For the 189D: Rotate the rod so the teeth face downward and then squeeze the trigger to advance it.
5. Apply the Bead
Place the nozzle at the starting point of your joint.
Squeeze the Trigger Evenly: Apply even pressure as you move the gun along the joint. Keep a consistent speed for a smooth bead.
Drip-Free Advantage: When you release the trigger, the flow should stop almost immediately. This lets you reposition or end your bead cleanly, with no mess.
6. Finishing the Bead
If you have the buddy finishing tool (112D and 102D), now’s the time to use it.
Press Gently: Adjust how much pressure you apply with the tool to smooth out the bead. The flexible rubber “finger” can be angled or pressed harder for different bead profiles.
Collecting Excess Material: You might notice some material collects in the “belly” of the buddy tool. Just remove the tool and rinse it with warm water when you’re done. It’s easy to keep clean and reuse.
7. Seal the Cartridge
When you’ve finished caulking, cap the nozzle with a tip cap or a piece of plastic to keep the material fresh. This prevents the sealant from curing inside the nozzle, making the cartridge reusable for your next project.
Troubleshooting Common Issues
Even with a drip-free gun, you might run into a few snags. Here are some common issues and tips on solving them:
1. Material Still Drips After Releasing the Trigger:
- Check to ensure you’ve fully released the trigger.
- Confirm the cartridge’s seal is properly punctured (a half-punctured seal can cause irregular flow).
- Make sure the rod is disengaging properly. Sometimes gently pulling back the rod a fraction can help.
2. Difficulties Pulling Back the Rod:
- Remember to hold only the back handle.
- On the 189D, verify the teeth are facing upward when you want to pull the rod back.
3. Inconsistent Bead Size:
- Try cutting a slightly larger or smaller nozzle opening. Start small and enlarge as needed.
- Maintain a steady hand and consistent speed while applying the bead. Practice makes perfect.
4. Buddy Finishing Tool Leaves Gaps or Rough Edges:
- Adjust the pressure you apply with the buddy tool. A lighter touch might yield a smoother finish.
- Experiment with angles—tilting the tool slightly can help smooth different surfaces.
Tips for a Professional Finish
Achieving a professional-quality finish isn’t just about having the right tool—it’s also about technique:
1. Steady Your Hand:
If you’re new to caulking, consider using a guide or masking tape along the joint. This gives you a visual line to follow and can help keep your bead straight.
2. Consistent Speed:
Move at a speed where you can maintain an even bead. Too fast, and you might create gaps or thin spots; too slow, and you risk building up excess material.
3. Angle of Application:
Holding the gun at a slight angle (around 45°) to the surface often makes it easier to control the flow and see what you’re doing.
4. Smooth Immediately:
If you’re using the buddy finishing tool or your finger (protected by a glove), smooth the bead right after you lay it down. Sealants begin to skin over as they cure, and it’s easier to shape them before that happens.
Maintenance and Care
A well-maintained caulk gun lasts longer and performs better:
1. Cleaning the Gun:
After you’ve finished your project, wipe down the gun with a damp cloth to remove any residue. For stubborn spots, gently scrape with a plastic tool. Avoid harsh solvents that might damage the tool’s finish.
2. Cleaning the Buddy Finishing Tool:
Simply remove it, rinse with warm water, and dry thoroughly before reattaching. Keeping this tool clean ensures it remains flexible and effective.
3. Storing the Gun:
Store your gun in a cool, dry place. Avoid leaving it outdoors or in direct sunlight. If you’re done with a partially used cartridge, leave the gun with the rod slightly loose and a cap on the nozzle to prevent curing inside the tip.
4. Check for Wear:
Over time, parts can wear out. If you notice difficulty in advancing the rod or if the spout cutter becomes dull, consider replacing these parts or upgrading to a new model. Regular maintenance ensures you’ll always have a reliable tool on hand.
Choosing the Right Model for You
Now that you understand the three drip-free models we’ve highlighted, you might be wondering which is best for your needs.
- 112D (Hex Rod, Parallel Frame): Ideal if you prefer a sturdy, balanced frame and the convenience of the buddy finishing tool. This model is excellent for users who do a lot of detailed work and want maximum control.
- 102D (Hex Rod, Cradle Frame): Great for beginners or anyone who likes a stable, cradle-style frame. It’s versatile, easy to handle, and includes the finishing tool, making it a solid all-around choice.
- 189D (Super Ratchet Rod, Cradle Frame): Perfect if you’re comfortable with a traditional ratchet-style gun and want that reassuring “click” as you advance the rod. While it doesn’t come with the finishing tool, it offers reliable drip-free performance and can handle tougher materials. You can always add a finishing tool separately if you find you need one.
Applications and Material Compatibility
These drip-free guns work well with a wide range of materials, including:
- Silicone Caulks: For bathrooms, kitchens, and windows.
- Latex Caulks: Ideal for interior projects, trim, and baseboards.
- Polyurethane Sealants: Great for exterior applications, masonry, and concrete joints.
- Acrylic Sealants: Easy to smooth and paintable, perfect for finishing work.
- Construction Adhesives: The drip-free mechanism ensures you won’t waste expensive adhesives.
No matter which material you’re using, these drip-free guns can help you achieve professional results with less mess and fuss.
Going the Extra Mile: Professional Results Every Time
If you’re a contractor or do-it-yourself enthusiast aiming for flawless results, consider these additional steps:
1. Prep Your Surface:
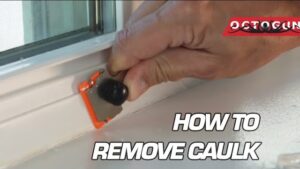
Make sure the joint or surface you’re sealing is clean and dry. Remove old caulk, dust, and debris before applying a new bead.
2. Masking Tape for Crisp Lines:
If you’re caulking in a high-visibility area, run strips of painter’s tape along either side of the joint. After laying down and smoothing the bead, peel the tape away for a perfectly crisp, clean edge.
3. Practice on Scrap Material:
If you’re new to caulking, a few minutes of practice on a piece of cardboard or scrap wood can help you get a feel for the gun’s trigger action, the flow rate of the sealant, and how the finishing tool works.
4. Follow Manufacturer’s Instructions:
Always read the instructions on your cartridge of sealant or adhesive. They often provide cure times, ideal temperatures, and recommended application techniques to ensure the best possible results.
Frequently Asked Questions (FAQ)
Q: Will the drip-free mechanism wear out over time?
A: Drip-free guns are engineered with durable internal components designed to last. With proper care and maintenance, the mechanism should remain effective throughout the tool’s lifespan.
Q: Can I use the buddy finishing tool on other guns?
A: While it’s designed specifically for these models, the buddy finishing tool could potentially be adapted to other guns. However, it’s always best to use the tool as intended for optimal performance.
Q: What if my sealant is very thick?
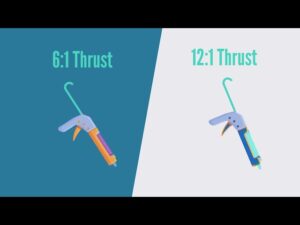
A: The drip-free feature works with a wide range of viscosities, but you may need to apply more pressure on thicker materials. Ensure your seal is fully punctured, and consider using a model with a higher thrust ratio if you frequently work with very dense products.
Q: How do I know when to replace my caulk gun?
A: If you notice the rod slipping, difficulty retracting or advancing, or a damaged frame, it might be time for a replacement. Regular cleaning and maintenance go a long way toward extending the life of your gun.
Contacting Newborn for Support
If you have any questions or need further assistance, don’t hesitate to reach out to our customer service team. We’re here to help you get the most out of your tools and ensure you’re confident in every step of your application process.
Conclusion
A drip-free caulk gun can revolutionize how you apply sealants, adhesives, and caulks. By preventing messy drips and giving you precise control, you’ll save time, reduce cleanup, and achieve a more professional finish—every time.
The three models we’ve covered—the 112D, 102D, and 189D—each offer their own advantages. Understanding how to hold the gun, adjust the rod, and use the built-in tools sets you up for success from the moment you load your first cartridge to the final finishing touch with the buddy tool.
With the insights provided here, you’re well-equipped to choose the right model for your needs and put your drip-free gun to work. Whether you’re sealing a bathroom fixture, installing new windows, or tackling a larger construction project, these tools will help you get the job done neatly and efficiently.
Thank you for reading and trusting Newborn for all your caulking and sealing tool needs. If you ever need further guidance, our customer service department is just a call or email away. Now, go out there and lay down some perfectly smooth, drip-free beads with confidence!
