Do you have moldy, discolored, or cracked caulk lurking in your home’s bathrooms, kitchens, or around your windows? If you do, you’re not alone—and it’s something that really shouldn’t be ignored. Damaged caulk is more than just an eyesore; it can lead to health issues, energy efficiency problems, and even water damage if it’s allowed to persist. The good news is that removing old caulk and getting ready to lay down a fresh, clean bead isn’t nearly as complicated as you might think. With the right tools, a bit of patience, and a straightforward step-by-step approach, you can set yourself up for a successful re-caulking job and a better-looking, healthier home environment.
In this post, I’ll walk you through three easy steps to remove that old caulk quickly and effectively. These steps mimic the approach I’ve used repeatedly, whether I’m fixing up a bathroom shower enclosure, touching up a kitchen backsplash, or sealing around windows to keep drafts at bay. We’ll cover everything you need to know, from choosing your tools to applying special adhesive removal sprays, and I’ll also share a few extra tips on ensuring the surface is perfectly clean before you put down a new bead. Let’s jump right into it.
Why Removing Old Caulk Is Important
Before we get into the step-by-step process, let’s talk about why it’s so important to remove old caulk in the first place. At first glance, it might just look like a cosmetic issue—some discolored lines along your sink or a cracked seal around your bathtub. But the truth is, old and compromised caulk can lead to bigger problems:
- Health Concerns: Mold and mildew thrive in damp environments, and when caulk starts to fail, moisture can seep into areas it shouldn’t. This dampness encourages mold growth. Mold isn’t just gross—it can cause respiratory problems and allergies for you and your family. By removing old, moldy caulk and replacing it with a fresh, mold-resistant product, you’re improving the air quality and protecting your health.
- Preventing Water Damage: In bathrooms and kitchens, caulk is often the first line of defense against water infiltration. When caulk cracks or shrinks, water can slip behind tiles, into walls, or under floors. Over time, this can lead to rotting wood, damaged drywall, and costly structural repairs. Preventing these issues is as simple as maintaining a good seal.
- Energy Efficiency: Around windows and doors, caulk seals up gaps that otherwise let conditioned air escape. In winter, you don’t want warm indoor air sneaking outside, and in summer, you’re looking to keep that cooled air in. Cracked caulk around windows, doors, or trim allows drafts in and your treated air out. This can translate to higher energy bills and less comfort. Refreshing these seals helps maintain a stable indoor temperature and keeps energy costs in check.
All these reasons underscore the importance of properly removing and replacing old caulk. It’s not just about keeping things looking nice; it’s also about safeguarding your home’s integrity, your family’s health, and your wallet.
Understanding the Tools You’ll Need
Before you get started, it’s critical to have the right tools on hand. The wrong tools can make the job harder, risk damage to surrounding surfaces, or just leave you frustrated. Here’s what I recommend:
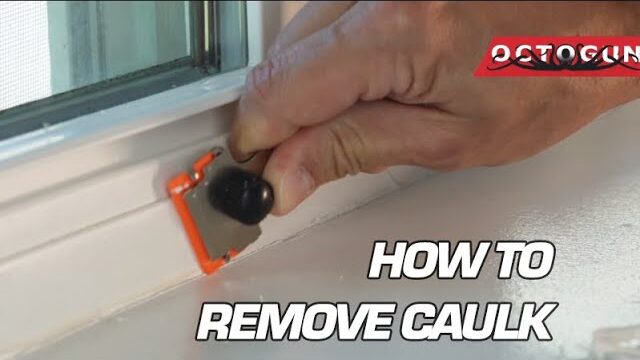
- Plastic Razor Blades: Plastic razor blades are a game-changer. Unlike metal blades, they’re less likely to scratch or gouge delicate surfaces. Metal blades can easily dig into wood or chip tiles if you slip. Plastic blades help break the seal of old caulk without causing serious damage.
- Scraper Tool: Attaching a plastic razor blade to a scraper tool gives you better leverage and control. A comfortable scraper helps you hold the blade at the proper angle and apply consistent pressure, making scoring and removal easier.
- Hook Tool: A hook-shaped caulk removal tool can be indispensable. After scoring and spraying, a hook tool can get into tight nooks and crannies, pulling out long strips of caulk in one go. It’s perfect for where two surfaces meet at a tight angle.
- Silicone/Adhesive Removal Spray: These sprays are formulated to break the bond between silicone caulk and the surface. Within about 60 seconds, you’ll find caulk easier to peel away. While not strictly necessary, using one greatly reduces effort and ensures a cleaner finish.
- Scrubbing Pad or Towel: After the bulk of the caulk is gone, you’ll need something to clean and smooth out the surface. A gentle scrubbing pad or microfiber towel helps remove tiny leftover particles, ensuring a clean surface for the new bead.
Step One: Score the Old Caulk
Why Scoring Helps
Your first step is to score the old caulk line. Scoring means making a shallow cut or groove along the top and bottom edges of the old bead. This loosens the caulk’s grip on the surfaces and sets you up nicely for what comes next.
How to Score Properly
Hold your scraper tool—armed with a plastic razor blade—at a slight angle, and gently run it along the caulk line. Do this along both the top and bottom edges of the existing caulk. Apply even pressure, and remember that the goal isn’t to remove the caulk yet, but to prepare it for easier removal.
Dealing With Different Surfaces
On tile, the plastic blade will glide without chipping. On wood trim, just be mindful of how much pressure you apply. With scoring done, you’ve created a weak point along the caulk line that will make the upcoming steps a breeze.
Step Two: Apply Silicone or Adhesive Removal Spray
Why Use a Removal Spray?
Now that you’ve scored the old caulk, it’s time to bring in the big helper: a silicone or adhesive removal spray. These sprays are designed to soften and break the bond between the old caulk and the surface. Instead of wrestling with stubborn bits, you’ll find the caulk loosening and lifting away with far less force.
How to Use the Spray
Shake the can and apply a generous, even layer along the caulk line. The beauty of these sprays is their quick action. Within about 60 seconds, you’ll notice the caulk becoming more pliable. Let the remover do the heavy lifting, and get ready for the main event: peeling that old caulk away.
Making the Most of the Waiting Period
While you wait those few seconds, gather your tools or prepare a small bucket to catch the removed caulk. The spray is working behind the scenes, saving you time and energy when you start to pull that caulk free.
Step Three: Remove the Caulk
The Main Event
With the caulk scored and softened by the removal spray, it’s time to remove it. Start by using the plastic razor blade to gently lift and loosen sections of the caulk. Many times, you’ll be able to peel away long strips with minimal effort.
Using the Hook Tool
If you hit stubborn spots or tight corners, reach for your hook tool. It can latch onto the caulk and pull it out cleanly. Move methodically and avoid yanking too hard. If something is resisting, a little more removal spray or an extra score line might be all it takes.
Patience Pays Off
Don’t rush. It’s crucial to remove every bit of old caulk before applying the new bead. Even tiny remnants can prevent proper adhesion. If you find leftover pieces, apply a bit more removal spray and give it another go. With a bit of persistence, you’ll achieve a perfectly clean joint.
Final Cleanup
After you’ve removed the bulk of the caulk, use a scrubbing pad or towel to remove any lingering residue. For best results, you can apply another light mist of removal spray, then gently scrub to clear out any tiny particles. By the time you’re finished, the joint should be smooth, clean, and free of any old caulk.
Preparing the Surface for the New Caulk
Thorough Cleaning
Now that you’ve removed all the old caulk, it’s time to clean the area thoroughly. Any dust, debris, or leftover chemical residue can interfere with the new caulk’s bond. Wipe the surface with a damp, lint-free cloth, and if the removal spray’s instructions call for it, follow their guidelines to ensure no residue remains.
Let It Dry Completely
Perhaps the most important part of prep work is ensuring the surface is completely dry before applying new caulk. Even a hint of moisture can cause mold growth or prevent the new bead from adhering properly. In moisture-prone areas, like bathrooms, consider letting it dry overnight. The drier the surface, the better your results will be.
Choosing the Right New Caulk
While this guide focuses on removal, it’s worth considering what caulk you’ll use next. Different areas call for different products:
- Bathrooms and Kitchens: Opt for a mildew-resistant silicone caulk. It’s flexible, durable, and stands up well to moisture.
- Windows and Doors: A paintable latex-based caulk may be ideal. It’s easy to clean up, paintable, and forms a good seal against drafts.
Invest in quality caulk to ensure a long-lasting seal that won’t force you to repeat this process anytime soon.
Applying the New Bead
When it’s time to lay down the new bead of caulk, follow these tips:
- Cut the Nozzle at an Angle: A 45-degree angle gives you better control and helps you create a uniform bead.
- Apply Even Pressure: Squeeze the trigger on your caulk gun steadily as you move along the joint.
- Smooth the Bead: Use your finger or a caulking tool to smooth the caulk and achieve a clean, professional look.
A properly applied bead will keep water out, prevent mold, and maintain energy efficiency where needed.
Common Pitfalls and How to Avoid Them
Rushing the Process:
One big mistake is not taking your time. If you rush through removal and don’t get every bit of the old caulk out, your new caulk may not adhere well. Slow down, follow the steps, and be patient.
Skipping the Removal Spray:
You might be tempted to save a few bucks by skipping the removal spray, but it makes a significant difference in how easily and cleanly you can remove old caulk. The small investment in a remover spray pays off in reduced effort and frustration.
Not Cleaning and Drying Properly:
Another common error is trying to apply new caulk to a damp or dirty surface. Any residue can weaken the bond. Take the time to clean thoroughly and ensure the surface is completely dry before laying down the new bead.
Dealing With Stubborn Caulk
Sometimes you’ll encounter extra-tough old caulk that’s hardened over time or sunk deep into crevices. Here are a few strategies:
- Multiple Applications of Removal Spray: Don’t hesitate to reapply the spray if needed. Each application can soften the caulk further, making removal easier.
- Switching Tools: If the plastic razor blade isn’t working well in a certain spot, try the hook tool or a soft brush dipped in removal spray for finer detail work.
- Gentle Heat: In some cases, gently warming the caulk with a hair dryer can soften it. Just be careful not to overheat the area or damage the surface.
Maintaining Your New Caulk
Once your new caulk is in place, keep it looking fresh and doing its job for years to come:
- Regular Cleaning: In high-moisture areas, wipe down surfaces regularly to prevent mildew buildup.
- Routine Inspections: Check the caulk line every few months for signs of discoloration, cracks, or gaps. Address any issues quickly before they worsen.
- Proper Ventilation: Reduce humidity by using fans or opening windows. Lower moisture levels help keep mold and mildew at bay.
When to Call a Professional
While most homeowners can tackle caulk removal and replacement themselves, some situations call for professional help. If you discover extensive water damage behind the old caulk—like rotten wood or moldy drywall—you may need a contractor to address the structural issues first. Also, if you’re working with delicate, high-end materials that could be easily damaged, consider hiring a pro who has the experience and specialized tools to handle the job safely.
Wrapping Up
Removing old, moldy, or cracked caulk can seem like a daunting task, but by following these three simple steps—scoring, spraying, and then removing—you’ll make the process efficient and manageable. The key is proper preparation: invest a little time and effort upfront, and you’ll reap the rewards of a cleaner, healthier home environment.
Remember, the benefits go beyond aesthetics. Properly maintained caulk lines help prevent mold, water damage, and energy loss. By taking the time to remove old caulk thoroughly, clean and dry the area, and apply a high-quality, mildew-resistant product, you’re setting your home up for long-term success. Whether it’s in the bathroom, kitchen, or around your windows, a fresh bead of caulk will keep things sealed, protected, and looking great for years to come.
By following the guidance laid out here, you can confidently tackle this DIY project. The result is more than just a crisp, clean line—it’s peace of mind, knowing you’ve safeguarded your home and health. So go ahead: pick up those tools, grab that removal spray, and give your home’s caulk the refresh it deserves.

