


If you’ve got a bathtub that’s looking a bit worse for wear, or you’ve just noticed that the old caulk is starting to fail and let moisture sneak in behind the tile, it might be time to freshen things up with a brand-new bead of caulk. Now, I know it can feel a bit intimidating if you’ve never done it before, but trust me, this is absolutely a project you can handle on your own. Don’t worry if you’re not exactly a DIY pro—if you follow these simple steps, you’ll get it done right the first time. And yes, you can totally make a few mistakes along the way and still end up with a professional-looking result.
In this blog post, I’m going to share three easy, quick steps that will help you caulk your bathtub like a seasoned handyman (or handywoman!). I’ll be walking you through the basics: from stripping out that old, crusty caulk to selecting the right product, cutting your caulk tube at the correct angle, and applying a smooth, even bead. We’ll also talk about how to tackle tricky corners, what colors of caulk to choose for different kinds of tile, and how to make sure it all dries correctly so it lasts for the long haul. By the end of this read, you’ll be ready to take on your bathtub and get it looking fresh, clean, and sealed up tight against moisture and mold.
Let’s dive right in!
Before You Begin: Removing the Old Caulk
Before you even think about laying down that new bead of caulk, you’ve got to remove all of the old stuff. This is crucial. Picture it this way: if you were going to paint a wall, you’d clean and prep it first, right? The same rule applies here. New caulk will not adhere well if the old caulk is still lurking in the corners and crevices. It also won’t stick properly if the surface isn’t completely dry and free of dust, grime, soap scum, and other residues.
To remove old caulk, start by using a utility knife, a caulk removal tool, or even a sharp, stiff putty knife. Gently run it along the edges of the old caulk bead and peel it away. If it’s stubborn and doesn’t want to budge, you can use a caulk softener solution (found in most hardware stores) that helps loosen it. The key here is patience—don’t rush this part. The cleaner and more thoroughly you remove the old caulk, the better your new caulk will adhere and the longer it will last.
Once all the old caulk is gone, wipe down the area with a clean rag and maybe a bit of rubbing alcohol or a mild bathroom cleaner. Just make sure everything is completely dry before you proceed. Moisture left behind can interfere with the new caulk’s ability to bond properly.
Step One: Choosing and Preparing the Right Caulk
Now that your surface is prepped and ready, let’s talk caulk selection. You’ve probably noticed that the caulking aisle at the home improvement store is stocked with an overwhelming variety of options. But don’t worry—it’s easier than it looks.
Type of Caulk to Use:
When you’re working in a high-moisture area like a bathtub or shower, you’ll want a caulk that’s specifically formulated for kitchens and baths. Why? Because these formulas are designed to resist mold and mildew, which is the exact kind of protection you need in a warm, damp environment. A good kitchen and bath caulk is typically silicone-based or a high-quality latex-silicone blend. It’ll say right on the tube that it’s mold and mildew resistant, so keep an eye out for that.
Color Considerations:
Most folks go with white caulk for bathtubs, and that’s a perfectly good choice. White tends to match most tubs, shower inserts, and the classic white bathroom tile. However, if your bathroom features a colorful or darker tile—maybe a cool iridescent strip around the top—then you might want to consider using clear caulk in those areas. This ensures that you don’t get an odd contrast line and helps everything blend more naturally. You can even find caulk in shades of almond, beige, and other neutrals if your tile and tub have a unique finish.
Prepping Your Caulk Tube:
Once you’ve got your caulk picked out, the next step is to prep it correctly. This might sound trivial, but how you cut the tip of the caulk tube truly matters. Grab your caulk gun—many come with built-in cutting tools—and snip the tip of the tube at a 45-degree angle. Start small. You can always cut the opening a little bigger if you find that not enough product is coming out. If you cut too big right off the bat, you’re stuck, and it’s harder to control the bead.
After cutting the tip, use the built-in poker tool (often found on the side of the gun) to puncture the inner seal of the caulk tube. If the tube is older and has some dried caulk inside, this step will clear the way so the fresh product can flow smoothly.
Step Two: Applying the Bead of Caulk
Now we get to the fun part—actually applying the caulk. This is where you might feel a bit nervous if you’ve never done it before, but relax! Remember, if you mess up, you can wipe it away and try again. Caulk is forgiving as long as you tackle mistakes before it dries.
Angle and Pace Matter:
Hold your caulk gun at a roughly 45-degree angle to the surface. This angle helps you control the flow and ensures that the caulk is pushed right into the joint between the tub and the tile. Move the gun steadily along the seam. Don’t rush; a nice, even pace will give you the best control. If you go too fast, you might leave gaps or thin spots. Too slow and you might end up with a thick, messy line. Don’t be discouraged if your first run doesn’t look perfect. You can always wipe it off and try again.
Tackling Corners and Odd Angles:
Corners are notorious troublemakers for new caulkers. My personal strategy is to start in the corner and work your way outward. This way, you can mound up a bit of extra caulk right where two lines meet and then smooth it out with your finger or a finishing tool. If you start from the middle and end in the corner, you may run out of room for your arm and caulk gun, causing you to apply the caulk at a weird angle and end up with a messy glob.
Work methodically around the entire tub. If the tub is in a shower, make sure you run a bead of caulk all the way up the corners where the walls meet, especially if there’s tile involved. Also, don’t forget the front of the tub where it meets the floor. If that line is cracked or missing caulk, water can seep under and cause damage over time.
Adjusting for Different Surfaces:
As you move along, you might have areas of tile or trim that differ in texture or height. Just keep steady pressure on the trigger and maintain that 45-degree angle. Adjust your pace slightly if you need to push a bit more product into a deeper crevice or pull back if the space gets narrower.
Step Three: Finishing and Smoothing the Caulk
Once you’ve got your bead of caulk laid down, it’s time to make it look perfect. Finishing the bead is what turns an okay job into a professional-looking result.
Tools or Fingers—Your Choice:
There are a couple of ways to smooth out the bead of caulk. If your caulk gun has a built-in finishing tool—some have a little angled piece of plastic on the end—you can run that along the bead to create a clean, uniform line. This tool is especially handy when working along straight surfaces, like baseboards or window trim.
When it comes to bathtubs, shower corners, and uneven tile, I personally love using my finger. It gives you the ability to feel the contour of the surface and apply just the right amount of pressure. Before you run your finger over the caulk, keep a bunch of paper towels nearby. You’ll need to wipe off the excess as you go, because your finger will pick up a fair amount of caulk. Run your finger slowly and steadily, pressing lightly. If you spot any uneven spots or gaps, just apply a bit more caulk and smooth again.
Don’t Let It Dry Before You’re Done:
You want to smooth and finish your caulk while it’s still wet enough to work with. If you wait too long—let’s say you walked away after applying it all—your caulk could start to skin over, and then you won’t get that super smooth finish. It’s best to finish as you go along each section. Apply the caulk in one manageable stretch, then immediately smooth it out.
Drying, Curing, and Clean-Up
Congratulations! You’ve got a fresh bead of caulk looking crisp and clean around your bathtub. But you’re not done quite yet. You need to let it dry and cure according to the product’s instructions.
Follow the Manufacturer’s Directions:
Some caulks claim to be shower-ready in as little as 30 minutes. Others might need a few hours, or even overnight, to fully cure. Make sure you read the label on your caulk tube and follow those instructions. Don’t rush this step—if you hop into the shower or run a bath too early, you risk washing away or smudging your carefully applied caulk before it sets.
Storing Leftover Caulk:
If you have some leftover caulk in the tube, don’t toss it out. You can seal the tip with a small piece of plastic wrap or a proper tube cap (sometimes included with the product) to keep it fresh for later use. Just remember that once opened, caulk can start to harden inside the tube over time, so try to use it within a reasonable window. If you do a lot of home projects, having a partially used caulk tube on hand can come in handy down the line.
Final Inspection:
Once the caulk is fully cured, take a moment to inspect your work. Look for any small gaps, lumps, or spots you might have missed. If you find something that bothers you, don’t panic. You can always cut out that small section and re-apply more caulk. The beauty of caulking is that it’s a pretty forgiving process. With a little time and patience, you’ll get a result that looks fantastic.
Troubleshooting Common Caulking Issues
Let’s face it, not every caulking job is going to be picture-perfect from start to finish, especially if you’re new to the process. Here are a few common issues and how to fix them:
- Caulk Won’t Come Out of the Tube:
If you’re squeezing the trigger and nothing’s happening, you might not have punctured the seal properly. Remove the tube, use a nail or the built-in poker tool, and make sure that inner seal is broken. Also, check that you haven’t cut the tip too small. If it’s too tiny, you won’t get enough product flow. Just snip a bit more off the tip and try again. - Uneven Bead or Too Much Caulk:
If you find yourself laying down a bead that’s too thick or looks uneven, don’t be shy about wiping it off and starting over. Caulk is relatively cheap, and it’s better to spend a few extra minutes redoing it than to live with an ugly line. If you notice a thick spot right after applying, just use your finger or the finishing tool to remove the excess, wiping it on a paper towel. Smooth it out again until it looks consistent. - Messy Corners:
Corners are tricky, but practice makes perfect. Try starting the line in the corner and moving outward so you have better control. If you still end up with a messy glob, simply wipe it away, apply a smaller amount of caulk, and run your finger or tool carefully in that spot again. Sometimes, pressing slightly harder in the corner can help push the caulk evenly into the joint. - Caulk Pulling Away as It Dries:
If you follow all the steps but notice that after curing, the caulk seems to pull away from the surface, it might mean there was still moisture behind it or the area wasn’t cleaned thoroughly. In this case, you might have to remove the caulk, let the surface dry longer, and try again. Ensuring a completely dry and clean surface is key for a lasting bond.
Additional Tips for a Professional Finish
- Tape It Off:
If you’re worried about keeping a straight line, especially if you’re caulking between two surfaces that really highlight a crooked bead, consider using painter’s tape. Run strips of tape parallel to the joint, leaving just enough room for your caulk bead. After you’ve applied and smoothed the caulk, carefully peel off the tape. You’ll be left with a perfectly straight line. Just remember to remove the tape while the caulk is still wet, so you don’t pull the caulk away with the tape. - Work in Good Lighting:
Make sure your bathroom is well-lit while you work. Good lighting helps you see exactly what’s going on with that bead of caulk, allowing you to catch mistakes before the caulk sets. - Ventilation Matters:
Some caulks have a strong odor, especially 100% silicone varieties. Crack a window or run the bathroom fan to keep the air circulating. This helps the caulk dry faster and prevents you from breathing in fumes. - Plan for Multiple Colors if Needed:
As mentioned, if you’ve got a special section of tile or trim that would look better with clear caulk instead of white, go for it. Just be ready to switch tubes and clean your finishing tool (or finger) between colors to avoid blending them. This extra effort can pay off with a more visually appealing result.
Maintaining Your Caulked Tub Over Time
You’ve done the work, and your tub is now sealed up beautifully. But maintenance is the key to keeping it that way.
- Regular Cleaning:
Keep your caulk line clean by gently wiping it down whenever you clean the tub. A quick wipe with a mild bathroom cleaner helps prevent mold and mildew from taking hold. Since you used a mold and mildew-resistant caulk, you’re already ahead of the game. - Periodic Inspection:
Every few months, take a quick look at the caulk line. Is it starting to yellow, crack, or peel away from the surface? These are signs it may be time for a touch-up or full replacement. Caulking isn’t a forever fix—it usually lasts a couple of years if done well, especially in a high-moisture environment. - Address Issues Promptly:
If you do spot small gaps or signs of mold growing behind the caulk, don’t wait. The sooner you fix the issue, the less damage moisture can do behind the scenes. Keeping your caulk line in good shape also helps maintain the integrity of your walls and the tub itself.
Wrapping It Up
Caulking your bathtub might feel like a chore, but once you get the hang of it, you’ll realize it’s a pretty straightforward DIY project that can really improve the look and functionality of your bathroom. A clean, neat line of caulk around the tub not only looks better, but it also helps keep moisture where it belongs—in the tub—and prevents it from sneaking into places that can cause long-term damage.
Remember, the process breaks down into three main steps: remove the old caulk and prepare your surface, choose and apply your new caulk carefully, and then finish and smooth it for a perfect seal. With these steps in mind, a bit of patience, and maybe a few practice runs, you’ll end up with a result you can be proud of.
So go ahead, give it a try. Grab your kitchen and bath caulk, cut that tube at a nice 45-degree angle, and start laying down a fresh bead. You’ll be surprised at how satisfying it can be to see that new line of caulk transform the edge of your tub. And once you’re done, you’ll have the confidence to tackle other caulking projects around the house—windows, sinks, countertops, you name it.
Still feeling a bit stuck on how to remove that old caulk in the first place or need more detail on the process? Don’t worry—there are plenty of resources (including how-to videos) that walk you through it step by step. Just remember, with the right knowledge, the right tools, and a bit of patience, you’ve got this. Now go seal that tub and enjoy your good-as-new bathroom!
You may also like:
 Sealing Your Gutters with Ease: A Hands-On Guide to the 720 DT Dual Thrust Gun
 How To Change the Push Disks on a Pneumatic Gun
 General Product Knowledge for Single Component Dispensers & Accessories
 Mastering the Drip-Free Caulk Gun: A Comprehensive Guide to the 112D, 102D, and 189D Models
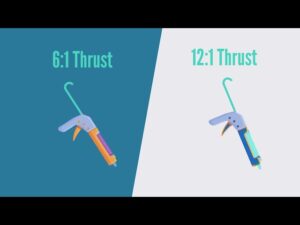 Mastering Thrust Ratio: Your Guide to Choosing the Perfect Caulk Gun for Any Project
 Mastering the Sausage Caulk Gun101: A Step-by-Step Guide
 Drip-Free vs. Thumb Release vs. Ratchet Caulk Guns: Which Caulk Gun is Best for Your Project?
 How to Easily Remove Old, Moldy, and Cracked Caulk in Three Simple Steps